
Sound Set Up
Job Description
This volunteer arrives early to set up the sound system, which includes microphones, instruments, large speakers, as well as smaller wireless speakers in the hallway.
Connect the tablet to the wifi shown on the sound system.
Grace Gatineau Sound Setup
(all left and right references are facing window, as pictured below)
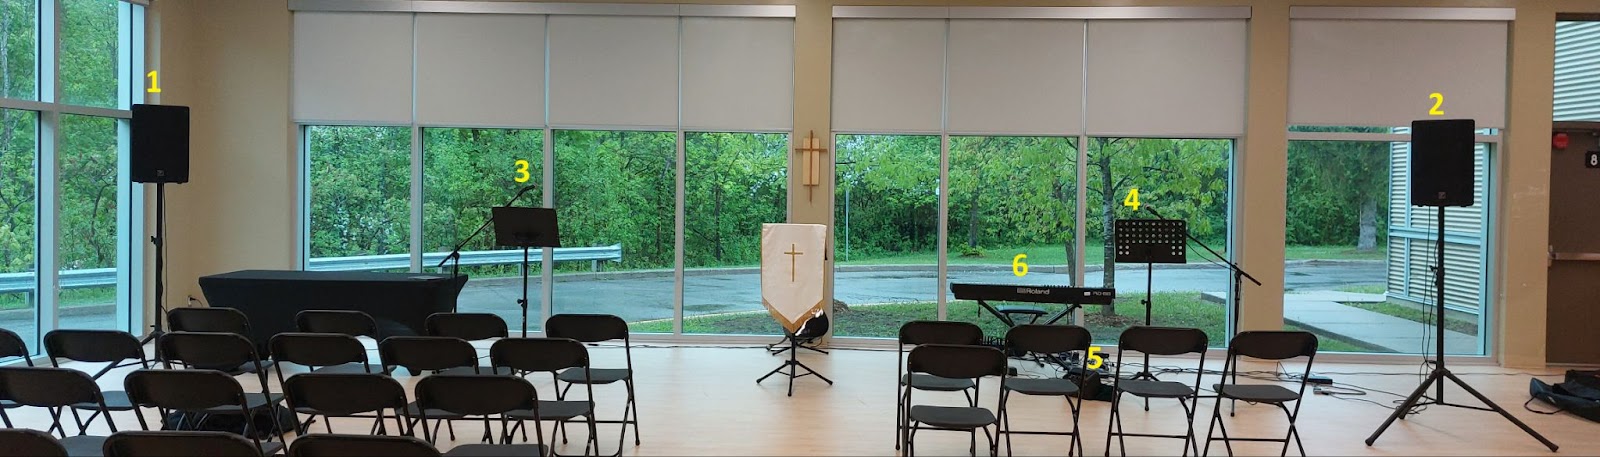
1&2 - Sound speakers - Make sure speakers point to the center back of the room
*Also make sure that both speakers are in FRONT of all other microphones
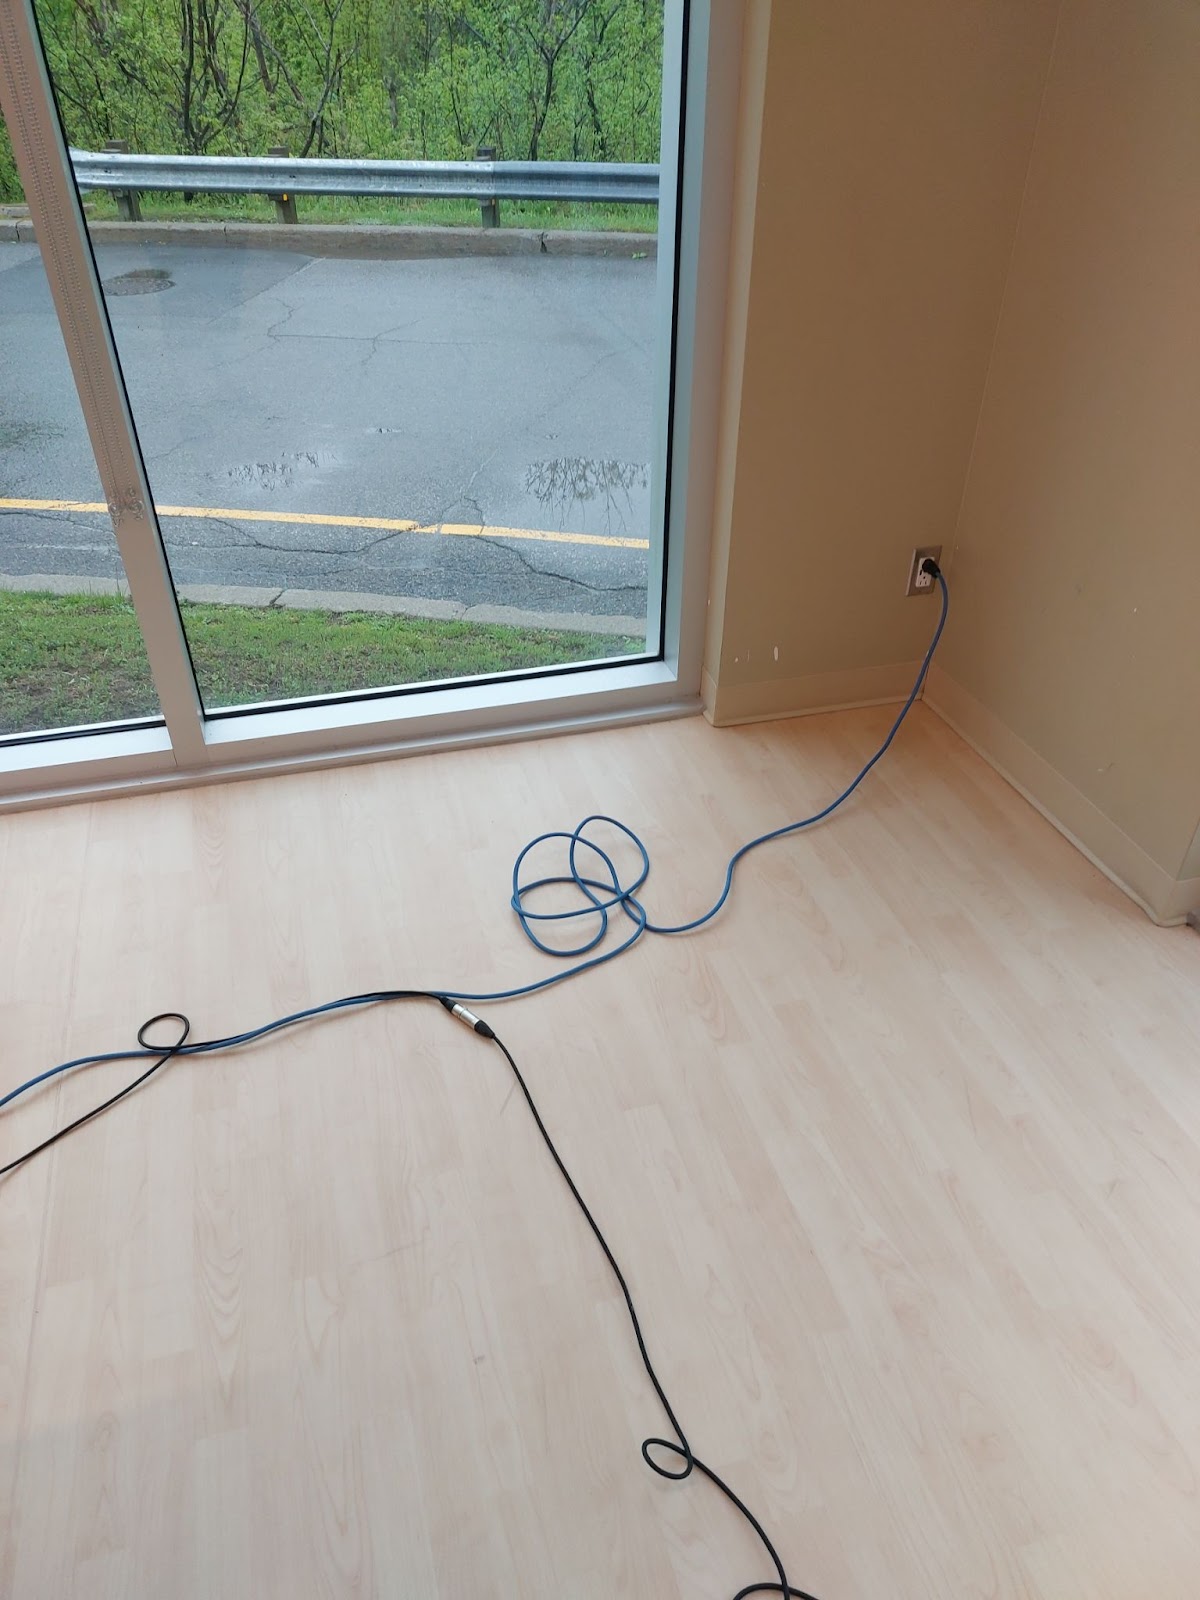
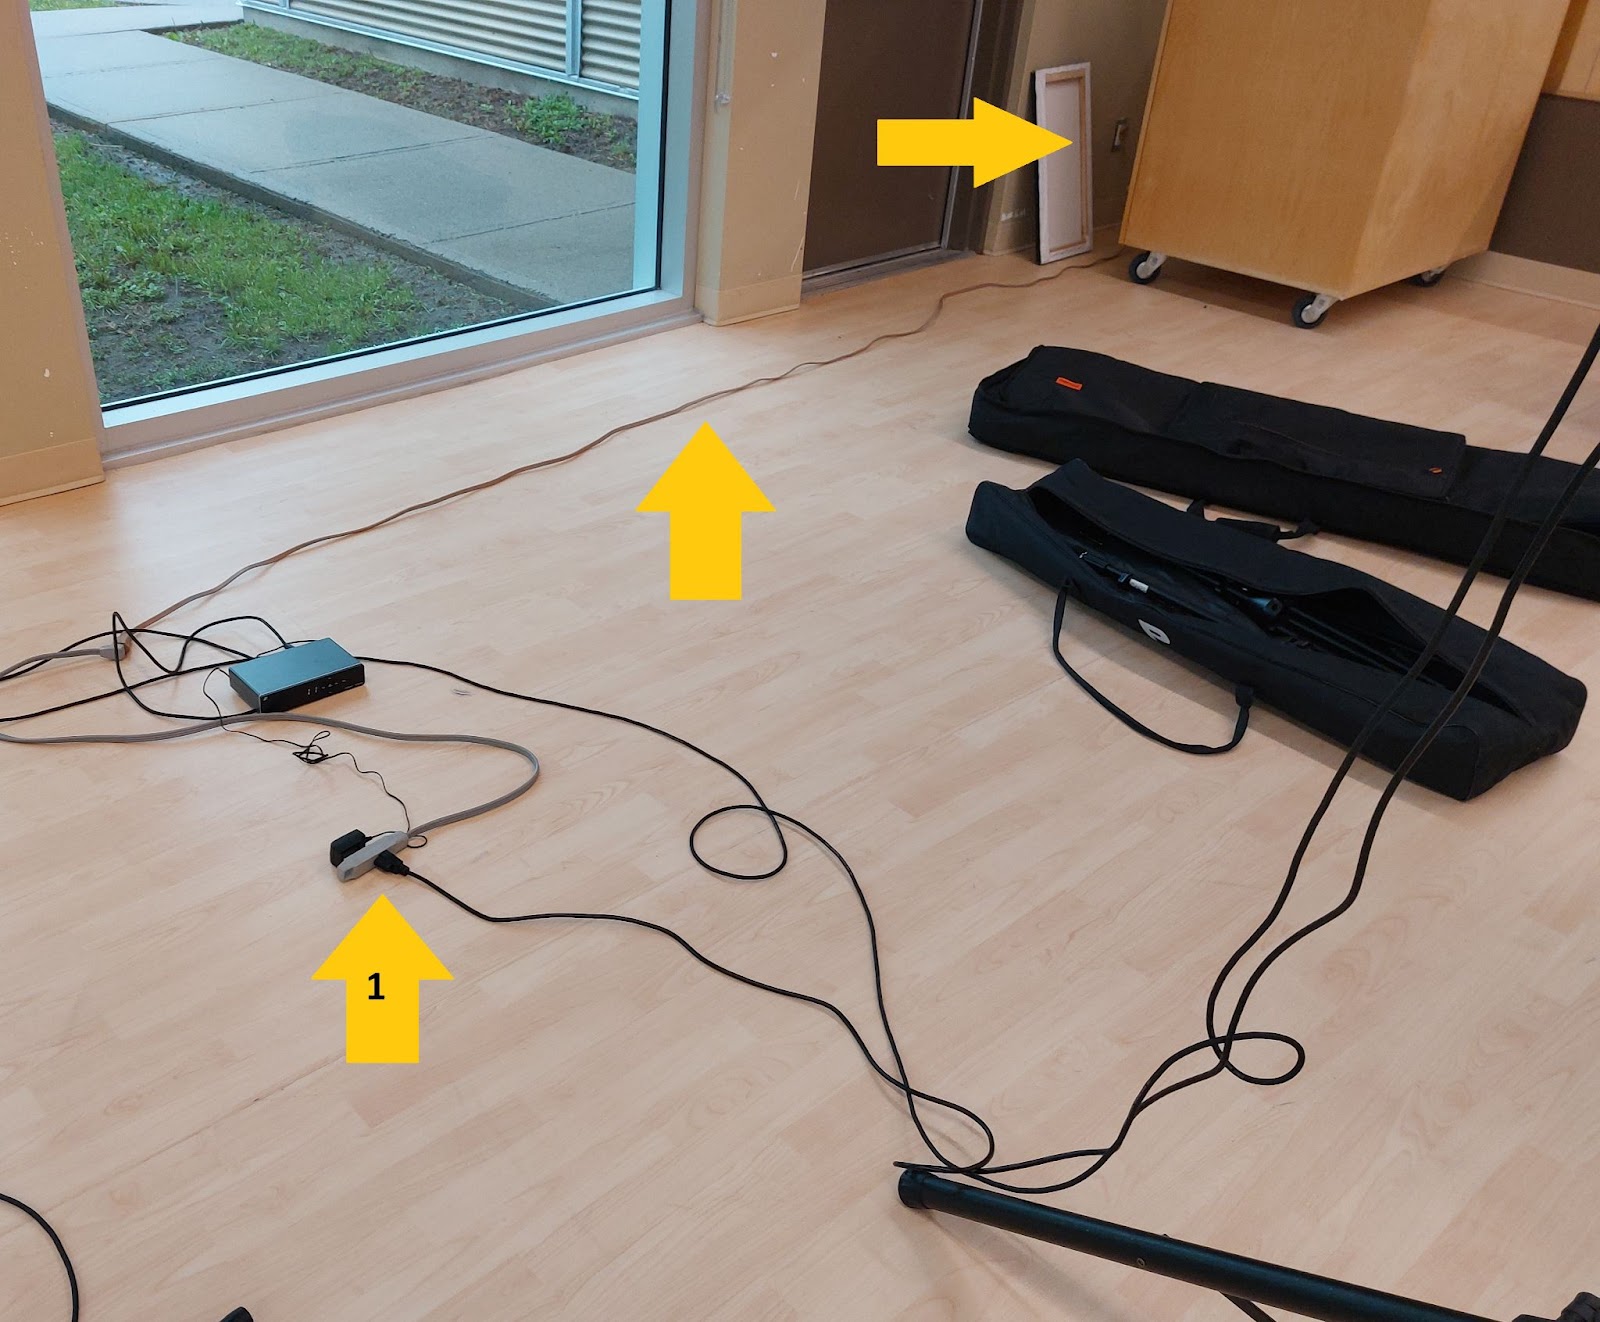
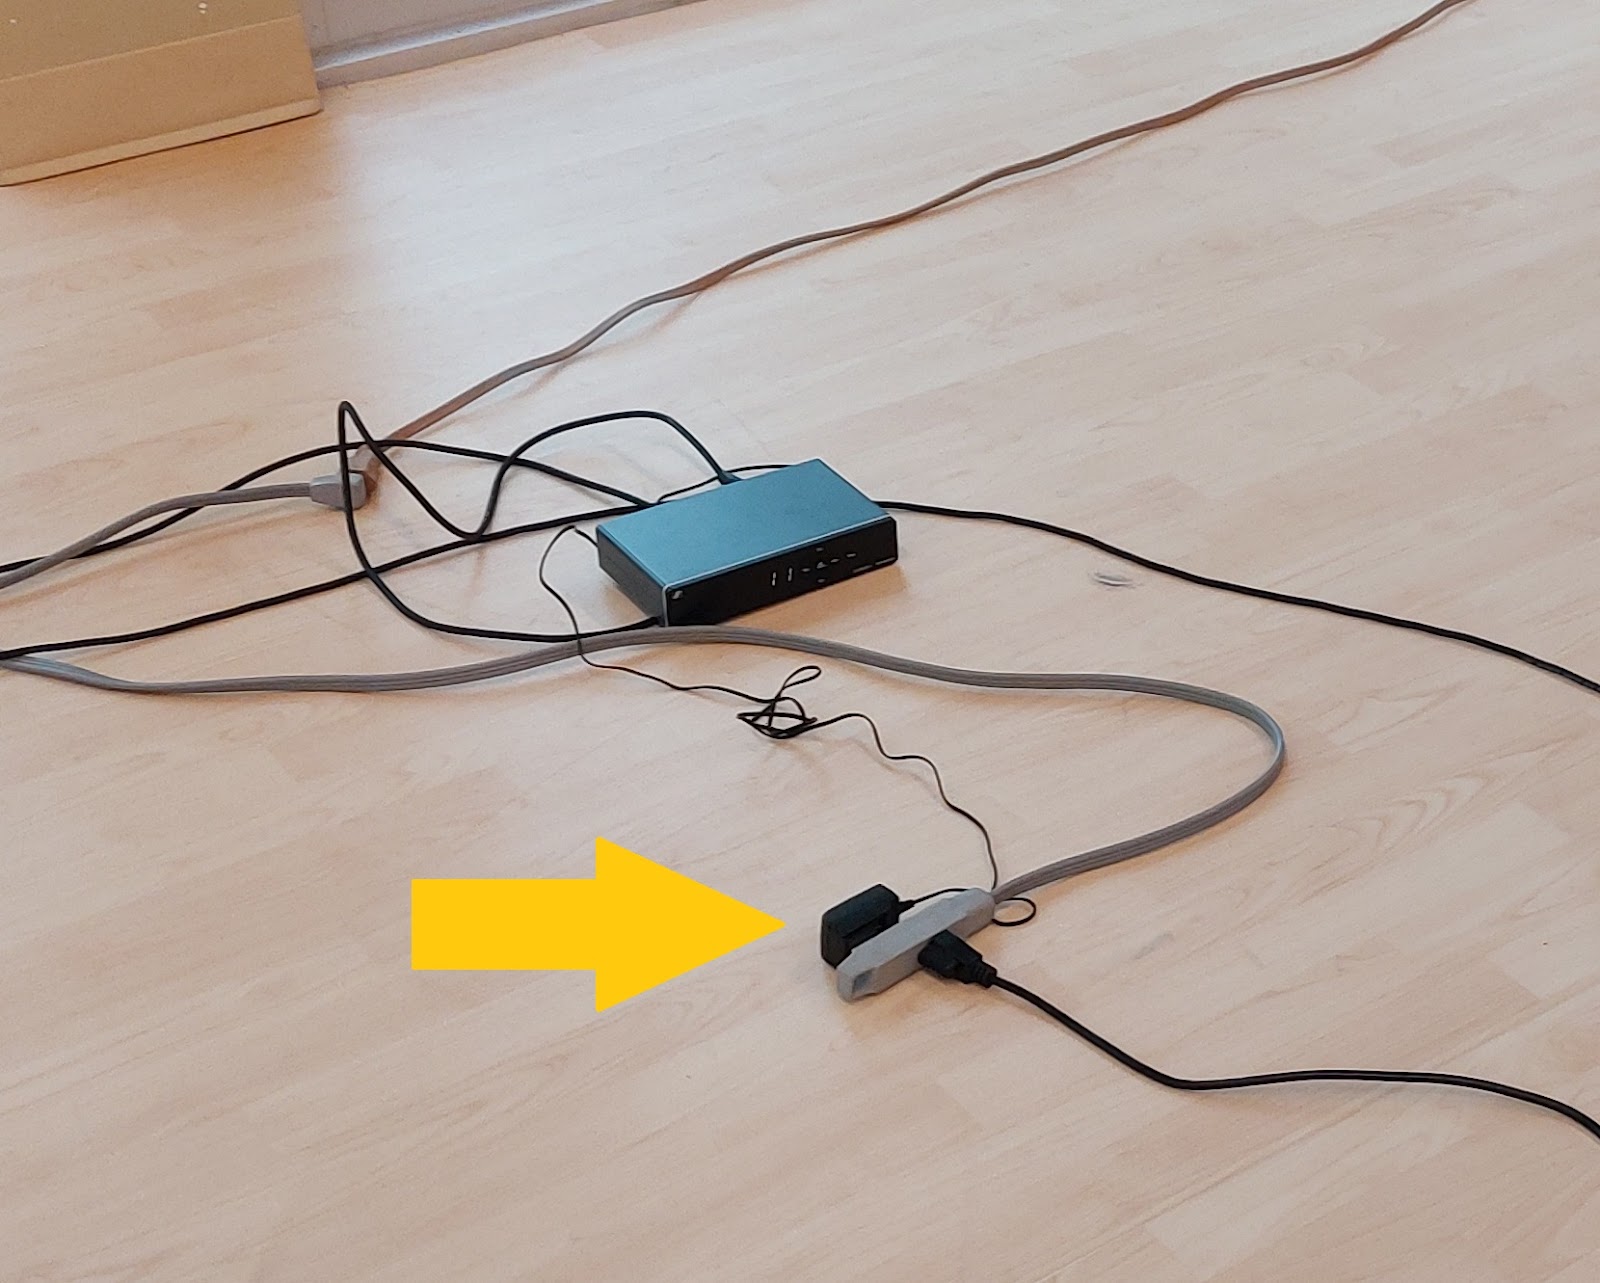
Plug blue extension cord on the left side of the room for speaker 1, plug the brown cord on the right side of the room. Then plug the right speaker (2) power to the grey extension cord (arrow 1 below)
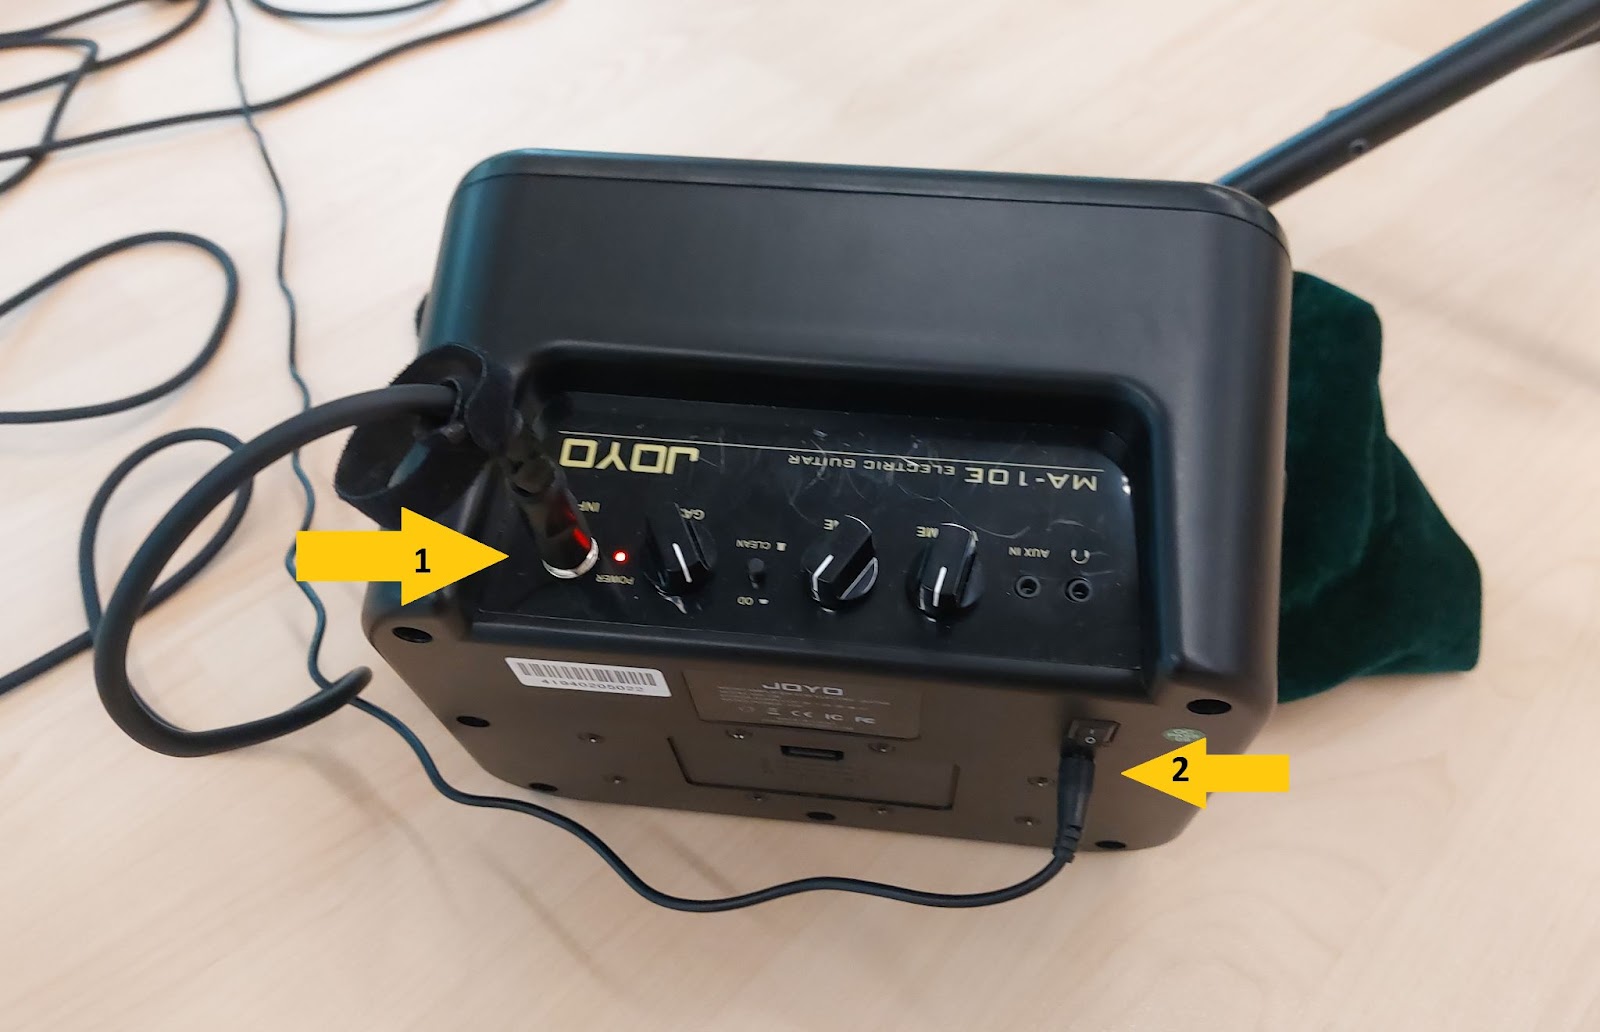
Speaker settings
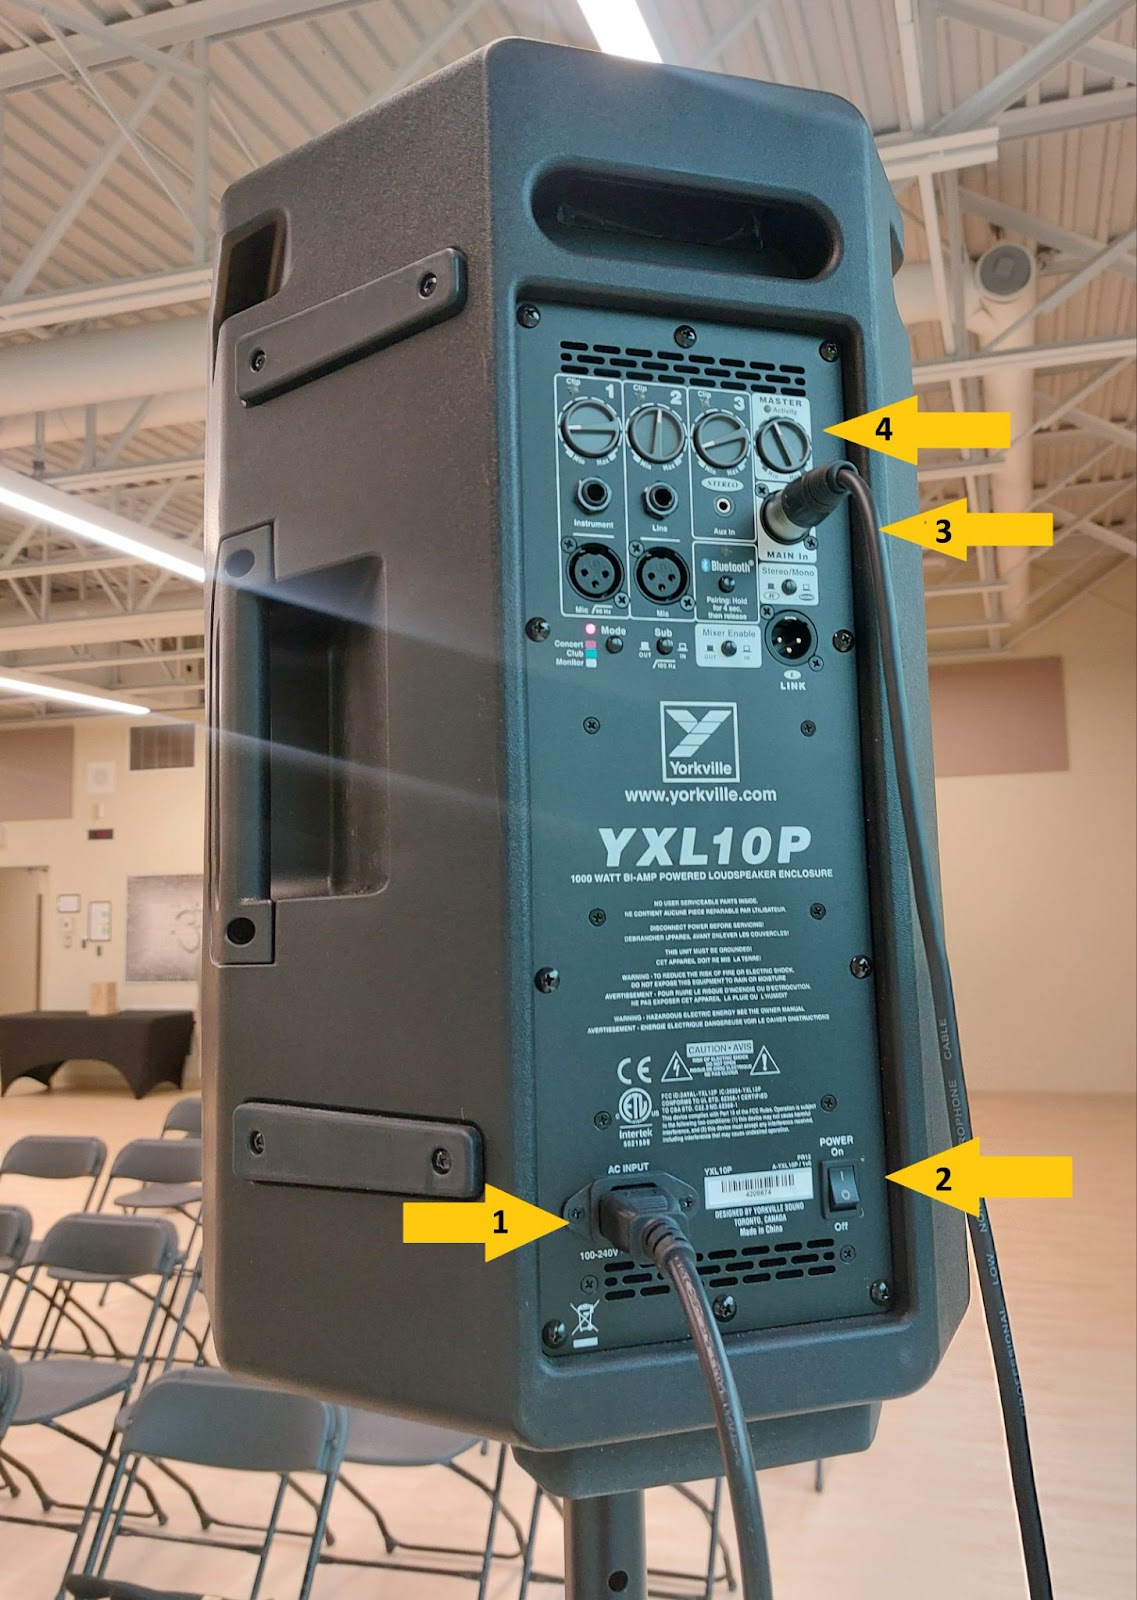
1: Power supply (from blue cord)
2: Turn on power (for sound)
3: connector to soundboard (see board schematics below)
4: this should be set to 11 o’clock
3 - Reader Mic, or second singer - Connect to soundboard, no power cord
4 - Piano Mic, or first singer - Connect to soundboard, no power cord
5 - Feedback speaker - so musicians can hear themselves.
1 - plug in AUX to soundboard
2- plug in power to powerbar and turn on power switch right above
6 - Piano - only setup if we have a player
1- plug in power to powerbar
2- plug in pedal
3 - plug in Left and Right cables from soundboard (doesn’t matter which is which)

7 - Soundboard Schematics - Power button is on the right under the handle
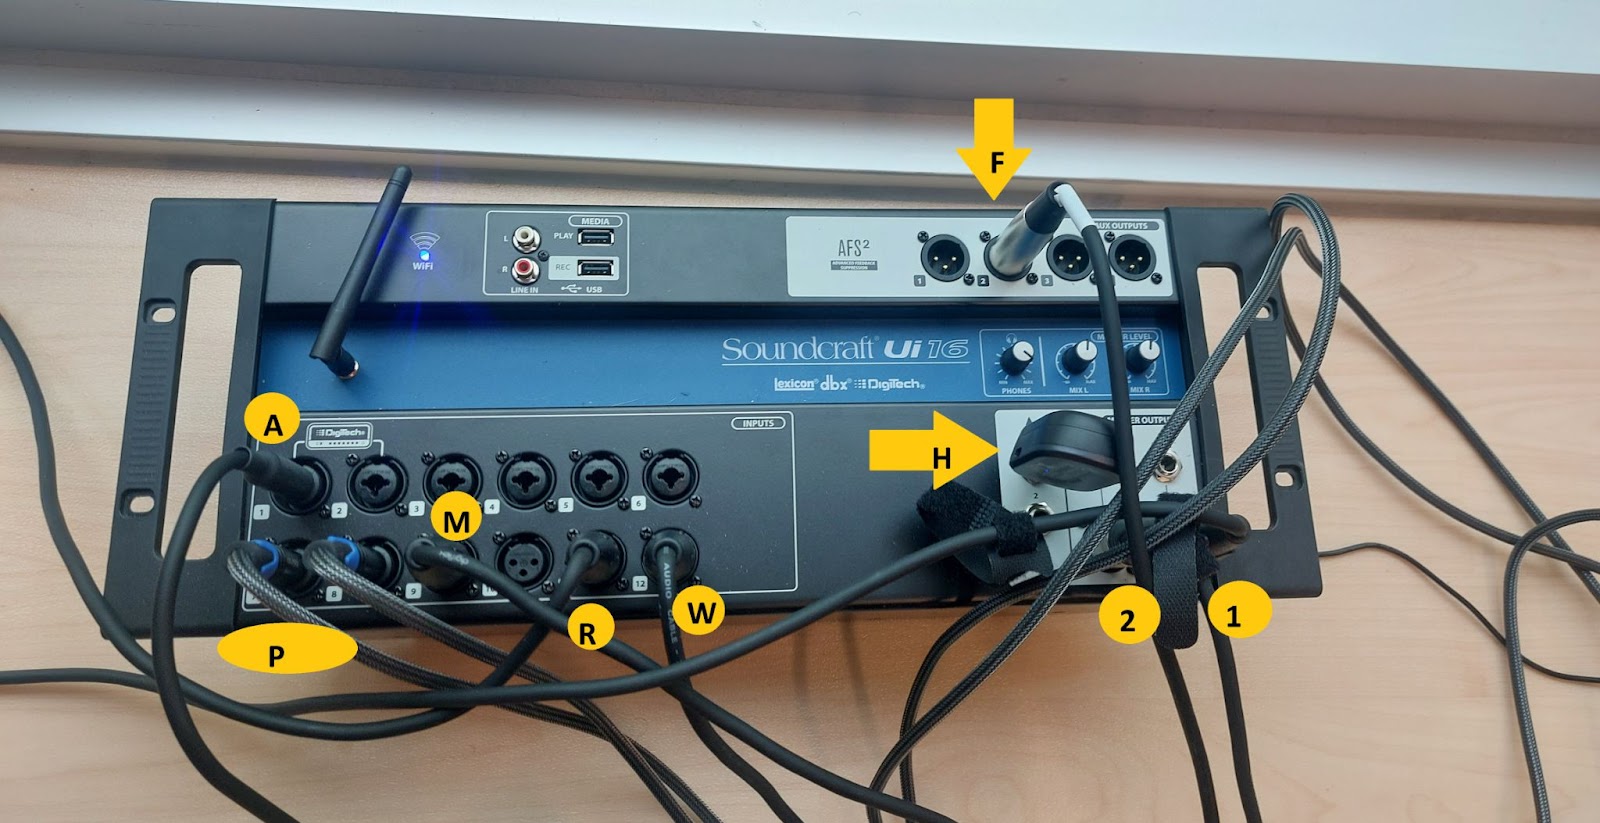
A - Franky’s Guitar, he plugs it in, stays with in guitar bag
P - Piano Left and Right, channels 7 and 8 (see #6 above)
M - Piano mic or first signer, channel 9 (#4 in first picture)
R - Reader mic or second singer, channel 11 (#3 in first picture)
W - Wireless mic, channel 12 (see below)
H - Hallway speaker, plug in “transmitter” to input 1 or 2 (doesn’t matter), see below
2 - Right speaker (shorter cord)
1 - Left speaker (longer cord)
F - Feedback speaker
W - Wireless mic: plug into grey extension cord next to right speaker (2)
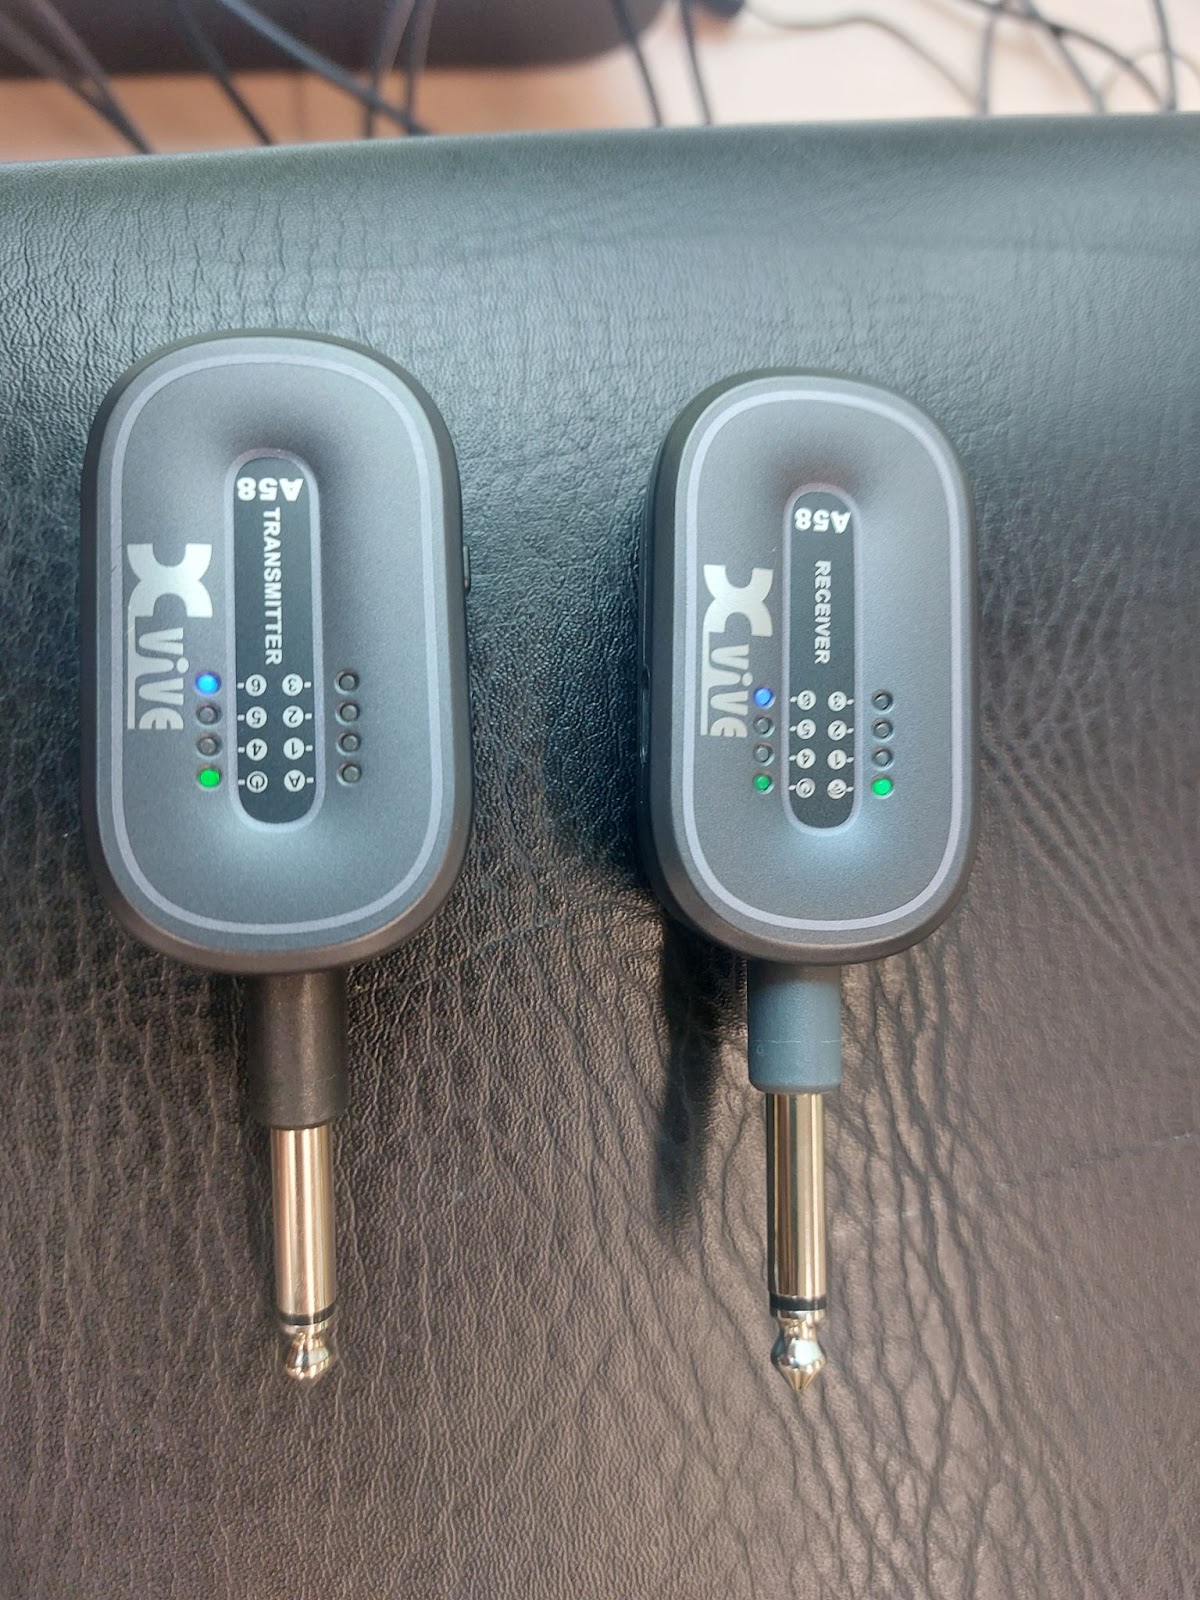
H - Hallway speaker wireless adapters - 2 sets
-Turn on both adapters, make sure that the blue light is on the same number for both (image shows channel 6). It doesn’t matter which number as long as they’re the same.
-Plug in “transmitter” to the soundboard input 1 or 2
-Plug in “receiver” to the small hallway speaker
-*Please plug in the set not in use during the service so they can charge for the following week.
Use the case with the “Grace” sticker, then at the end of the service place the charged set in the case with the grace sticker for use following week.
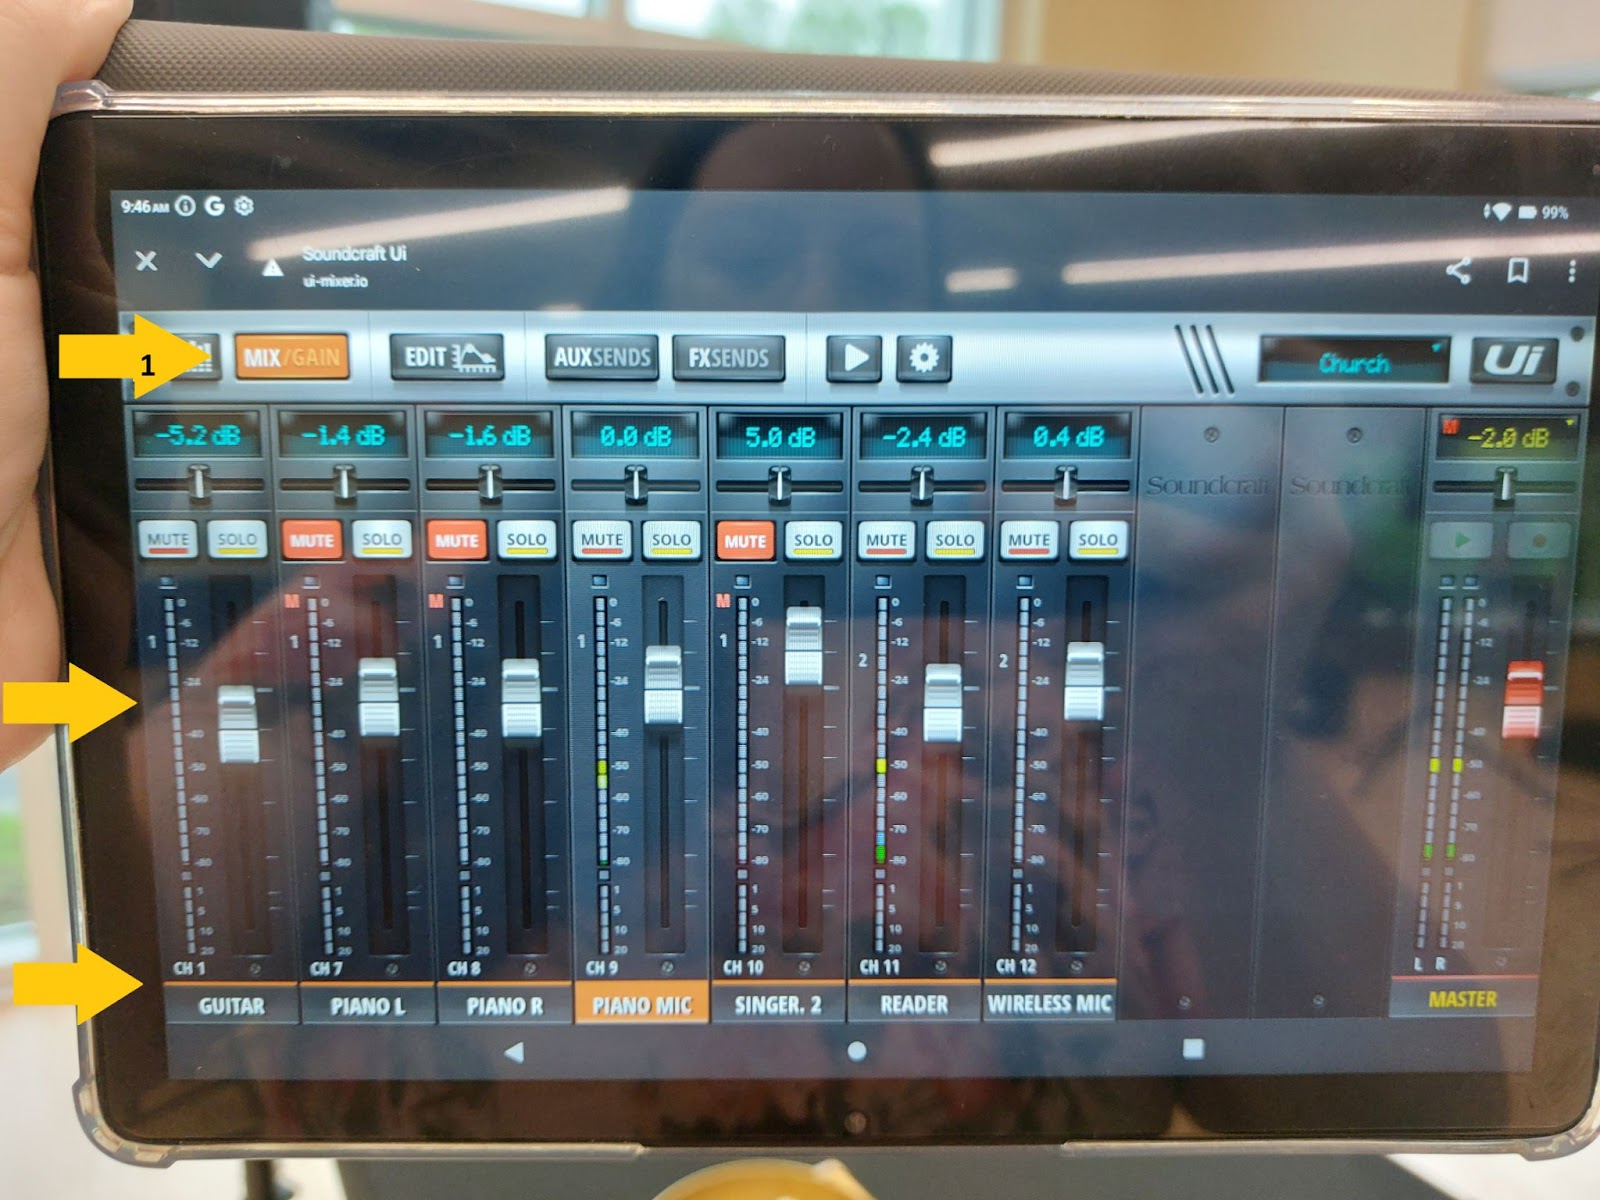
8 - Ipad
1 - Mix/Gain: The channel numbers on the soundboard correspond to the channel numbers on the ipad (bottom arrow below).
The levers change the gain, which is how much sound the mic is picking up. If the speakers are sending feedback, lower the gain, and if you have trouble hearing something, increase the gain.
*The levels should already be set close enough. No more than minor adjustments should be necessary.
*The red lever on the far right is the master control, DO NOT TOUCH
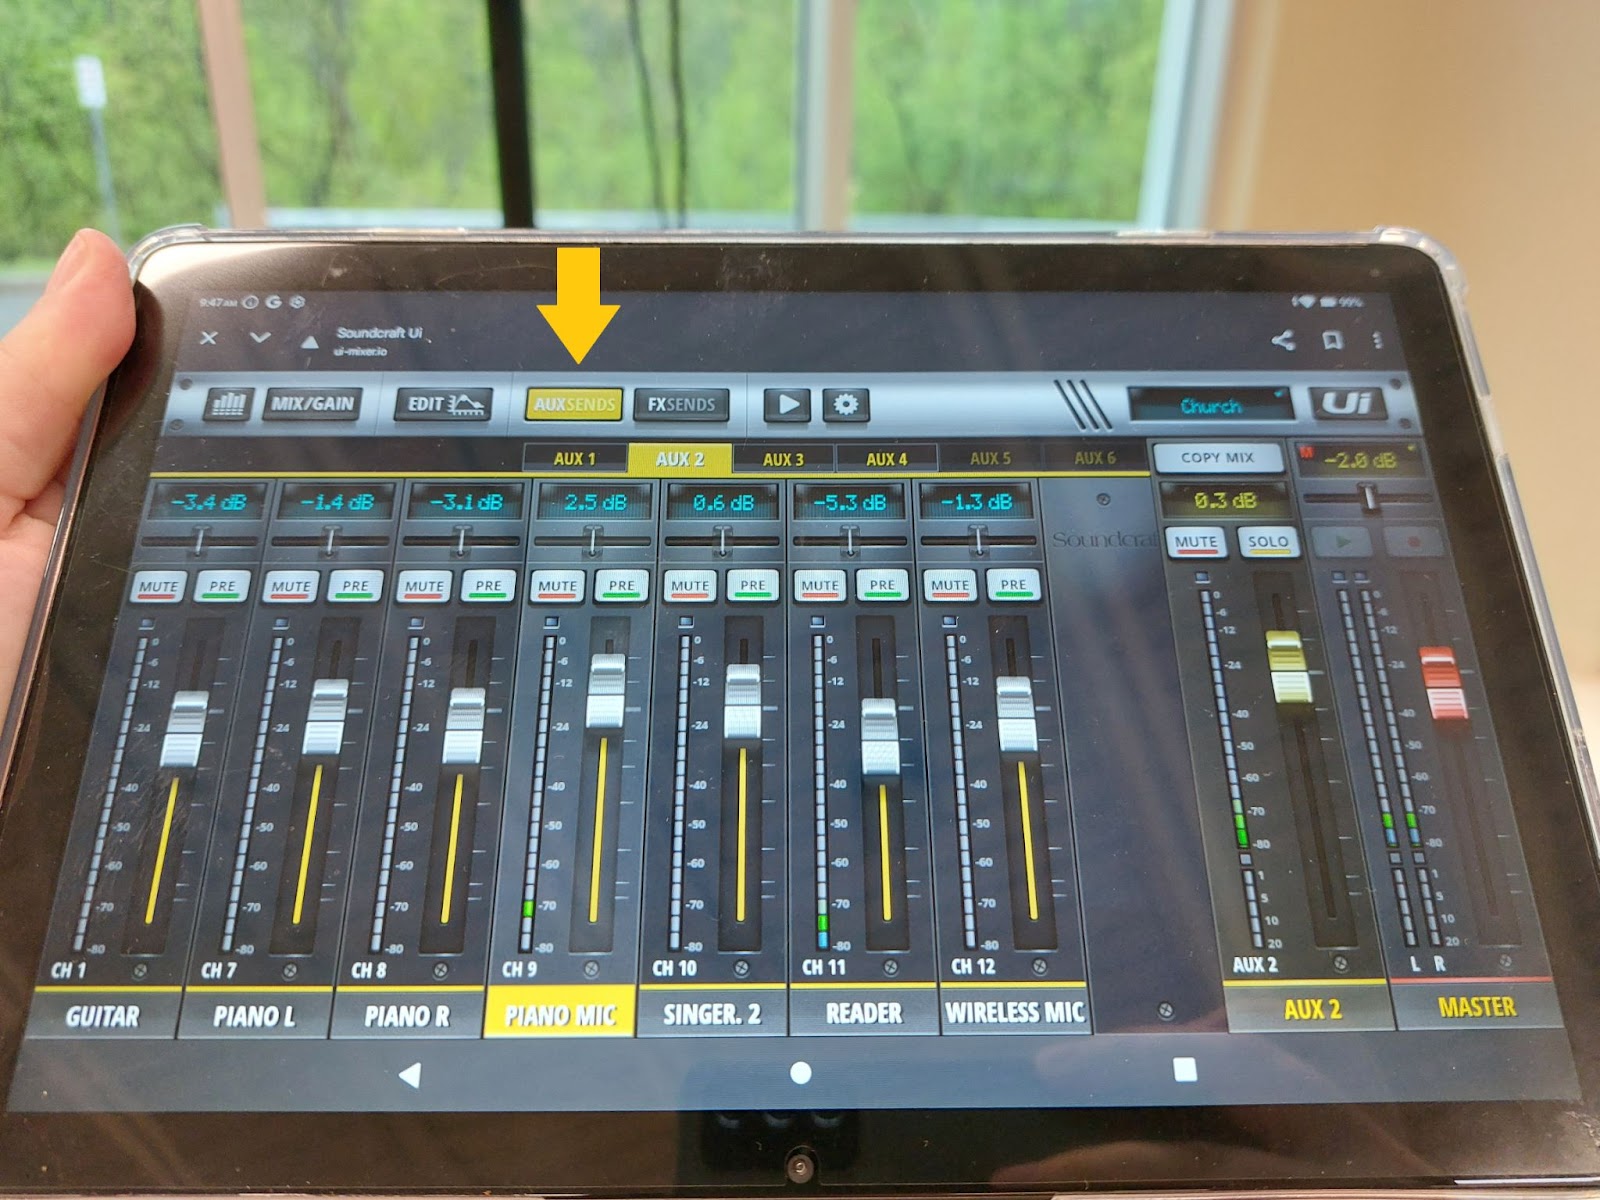
2- AUXSends: these are the controls for what is coming out of the feedback speaker.
Join Our Volunteer Team Today
"As each has received a gift, use it to serve one another, as good stewards of God’s varied grace."
- 1 Peter 4:10
